Microsoft Graph API- a practical example in python
by Torben Bruns |
Feb 16, 2023 |
“Nothing is as constant as change.” Following this theme, Microsoft is planning to discontinue Azure AD Graph in 2023 and introduce something new: Microsoft Graph. It will not only replace the former API but also enhance it with new capabilities. Apart from interacting with Azure AD Graph, the new API can also communicate with Microsoft 365 products. If you want a successful pipeline run to post a message in a Microsoft Teams channel, Microsoft Graph can do it. And if an application needs to send emails to users, Microsoft Graph can also handle that.
To put it simply, Microsoft Graph is a REST-API and acts as gateway to numerous services Microsoft365 offers [1].
Using Microsoft Graph in your environment
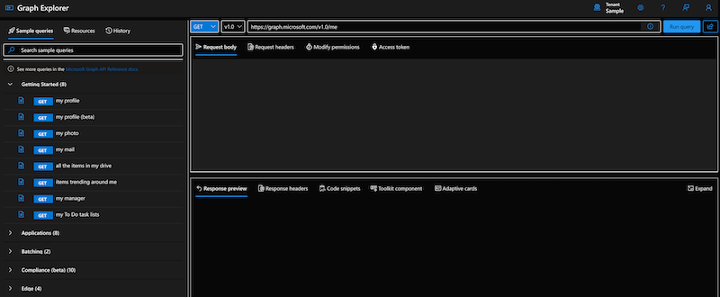
To begin with, you need an active subscription for Microsoft 365. The actual plan does not matter, as even the Basic tier is sufficient. If you want to get a first look at the API’s capabilities, check out Microsoft Graph Explorer. (https://developer.microsoft.com/en-us/graph/graph-explorer).
Writing our own application
If you want to create your own application, let’s get started. Let’s consider an application that monitors inventory stock. As soon as the stock falls below a certain number, an email should be sent to the orders team.
We will focus on the following things:
• Registering an application in Azure AD
• Setting up a Graph Client in Python
• Sending an email
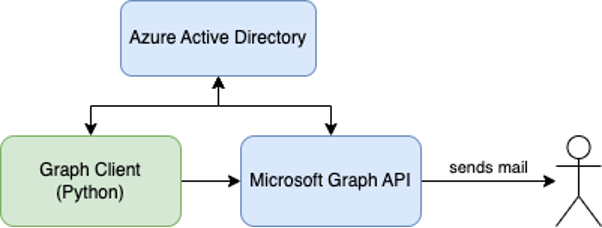
The image below visualizes what we want to achieve.
Monitoring the stock is not covered within this article.
AzureAD Registration
There are two types of permissions in AzureAD:
Delegated permissons
Application permissions
With delegated permissions the application acts as a logged in user like the Graph Explorer does. Application permissions on the other hand allow the app to act as own entity rather than on behalf of a user. Downside is that for this type of permission you need administrative rights.
After this short explanation on types of permissions in Azure let us begin with registering an application in AzureAD.
Go to portal.azure.com and login with your credentials
Click on Azure Active Directory
From the left side select App Registrations
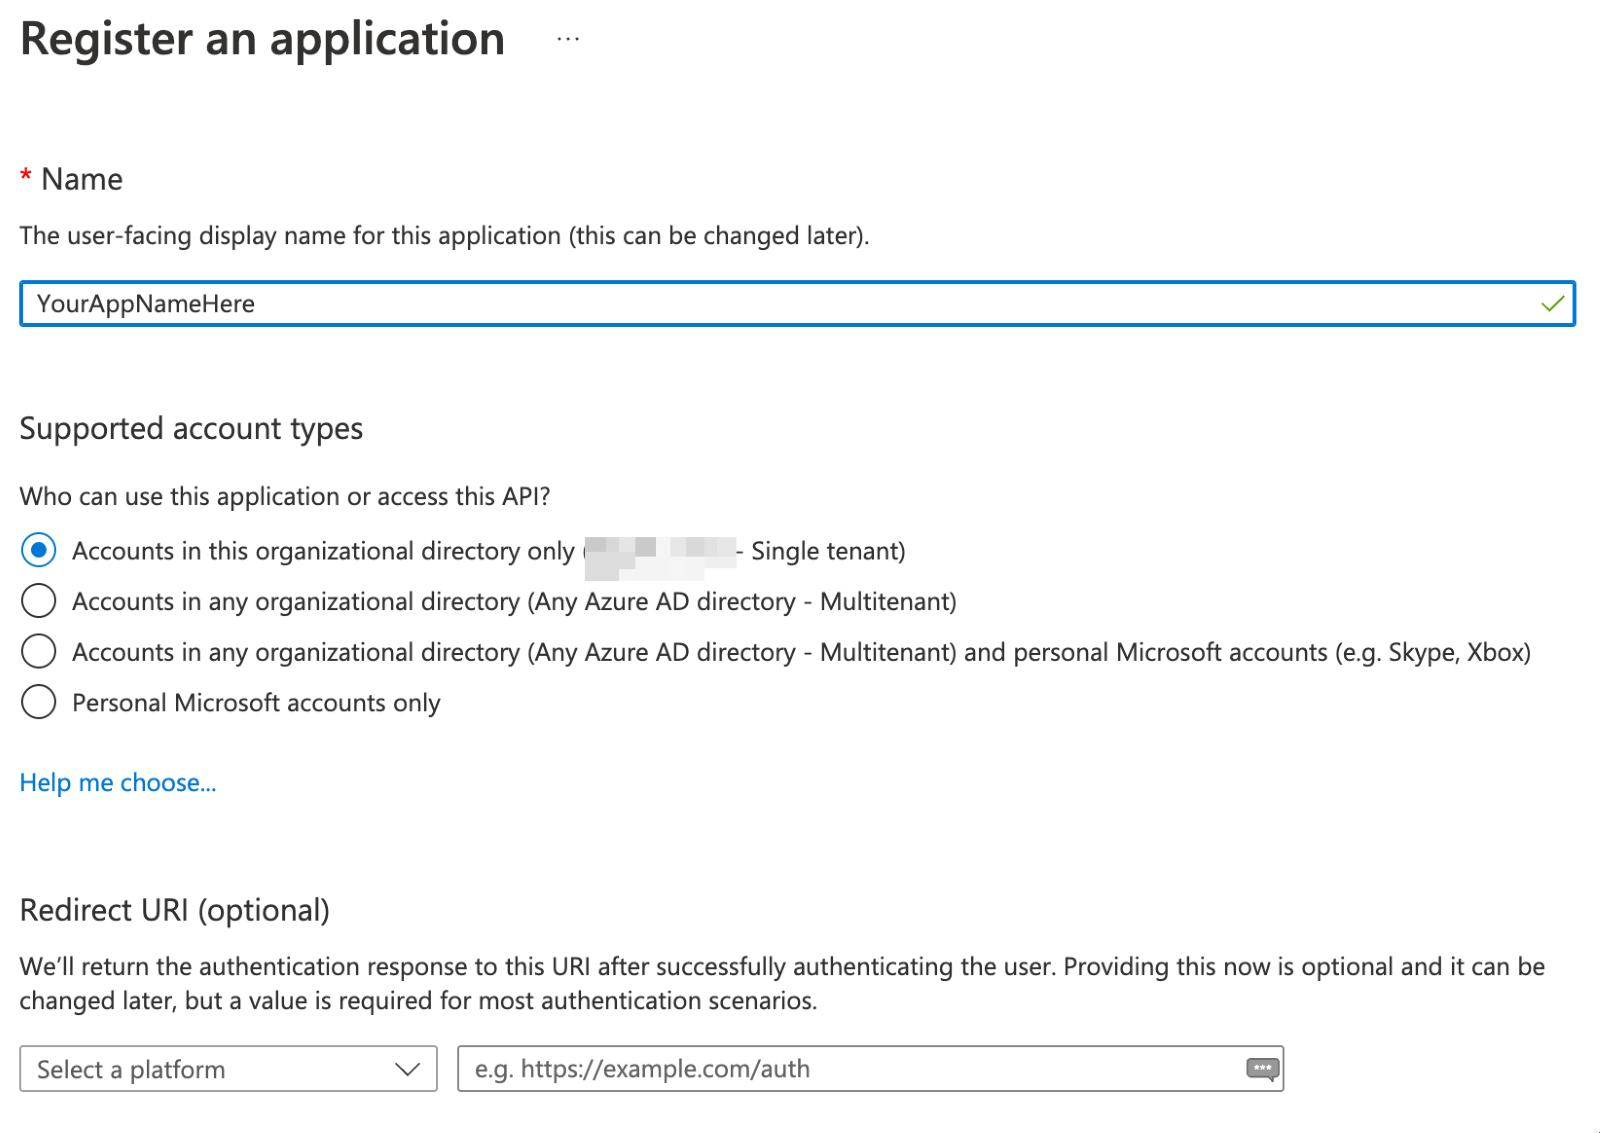
Click on New Registration and copy the configuration from below image
The supported account types can be adjusted to your needs.
Click on the newly created app registration
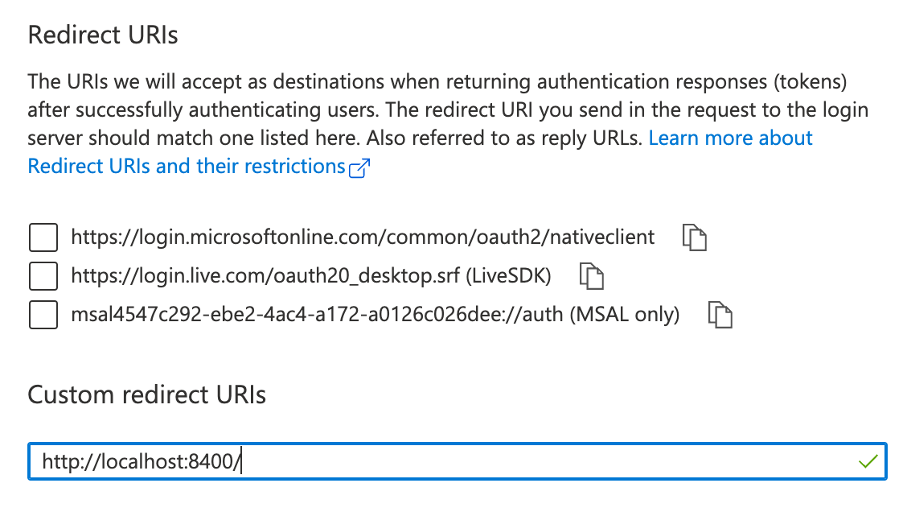
Select Authentication from the menu on the right
Add a new Authentication of type Mobile and desktop application
For our example to work enter below configuration:
Switch the slider for Allow Public Client Flows to the “on” position and save
From the menu select Certificates & Secrets
Add a new client secret and remember to save it as it is only shown once
Go to API permissions and select permissions like shown below
That is all, the configuration of the application in the Azure portal is done.
Save the following values for later:
Client id
Client secret
Tenant id
Implementation
For the purpose of simplicity, I used Python. Microsoft offers SDK’s for different languages like C#, Java, Go and PHP. Still, all that is necessary is implementing HTTP-Calls. If there is no SDK for your specific language, you are only losing some comfort.
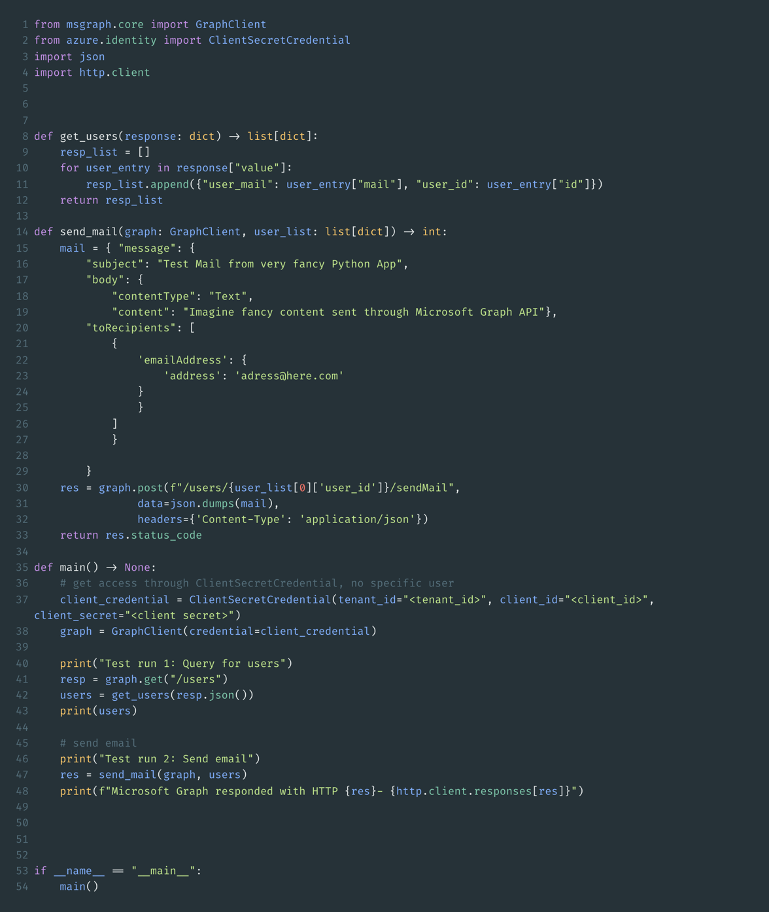
Let us have a look at the source code:
The packages “msgraph” and “azure” make it relatively simple to implement a Microsoft Graph API client. First, a GraphClient is created, which then queries the API for a list of users. Then, we call the “send_mail” function, which takes a GraphClient and userlist as inputs. It sends an email with some example text on behalf of the first user found in the list using their Outlook account to the recipients listed under the keyword “toRecipients”. If you want to know the exact mechanism, please refer to Microsoft’s documentation [4].
A mail is not limited to plain text, it is also possible to send attachments through a call to the url
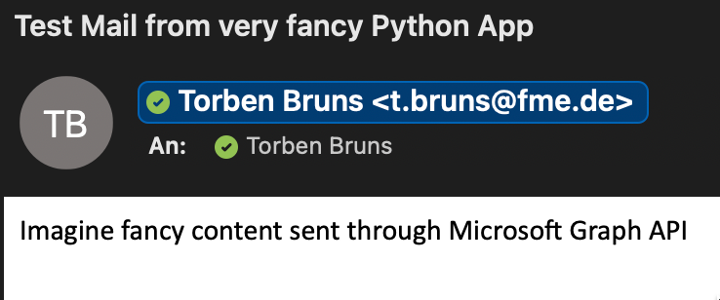
The result of the above call to the API looks like this:
Conclusion
The Graph API is a powerful gateway to the services offered by Microsoft. There are numerous applications imaginable, such as status updates on pipeline runs through Teams, email notifications like in the example, or user management within Azure AD.


0 Comments